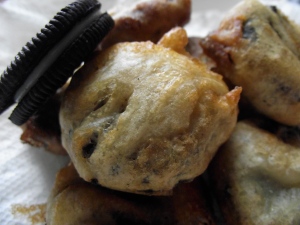
Quesadillas Six Ways

So as it turns out, it’s your week to host game night at your place. That one house last Tuesday had pizza and the other apartment ordered a thousand wings to feed the masses. Now what? Should you do the same? Make your usual signature green bean casserole? Sure, you could go that route. Nothing wrong with that at all.

But here’s another suggestion that may take the fuss out of feeding a large, diverse crowd: Take a few staple ingredients then prep and separate them into their own serving bowls. Serve these with a choice of whole wheat, flour, and/or spinach tortillas and the possibilities are endless. Almost.

p.s. This is by no means a Mexican recipe; I just borrowed the concept, ya hear!

Here’s what you’ll need:

1 lb ground beef, cooked and sauteed with garlic and onions

1 package polksa keilbasa, sliced and cooked until browned

5 cups arugula

1 bunch cilantro

5 tomatoes, diced

4 cups sauteed mushrooms, green peppers, onions

gruyere cheese

cheddar cheese

2 packages of flour tortillas

sour cream

salsa

serves: 4-5

The pairings below are some of my favorites, but feel free to mix it up on your own and use whatever you have on hand.

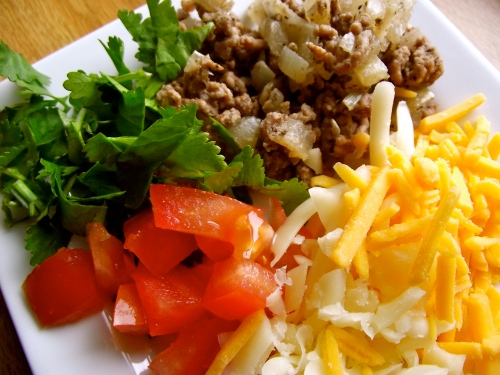
Pairing 1: Ground beef, Cilantro, Tomatoes, Gruyere and Cheddar

I love cilantro..and I get a little heavy handed with this guy whenever I make my quesadillas. Yumm. A friend of mine, who can’t stand the stuff, likens the taste to soap. Tragic! I say. ‘Tis a wonderful flavor to be likening it to dove.

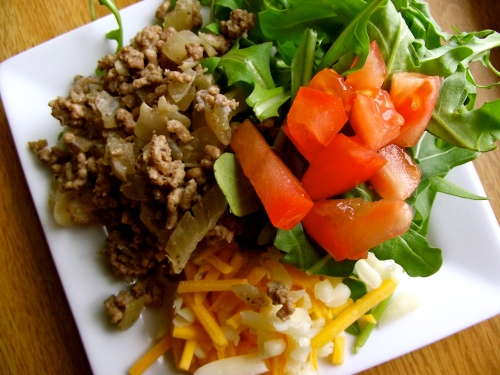
Pairing 2: Ground beef, Arugula, Tomatoes, Gruyere and Cheddar

Growing up, I didn’t like Arugula. I tried it for the first time when I was 10 years old at a fancy wedding, eating salad comprised of leaves that could have been pulled from my backyard. My suspicions were confirmed when the menu read, Dandelion Salad.

I admit, this first experience deterred me a bit from foraying into different salad greens aside from my beloved hearts of romaine, iceberg and butter lettuce. But I gradually developed a penchant for Arugula’s peppery, spicy taste after having incorporated it into a number of non-salad adventures. That’s another story.
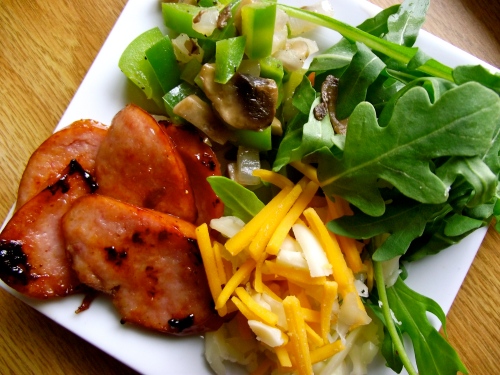
Pairing 3: Polska Keilbasa, Sauteed Mushroom, Green Pepper and Onion, Arugula, Gruyere and Cheddar

Enjoying food is also about enjoying the texture. And I love a bit of crunch in my quesadilla. The green peppers do for me, what pickles do to my sandwich. You see what I just did there?

Use red, green, or yellow peppers. Use turkey sausage or brats. Whatever floats your boat, whatever makes your mouth water…

Pairing 4: Polska Keilbasa, Cilantro, Tomatoes, Gruyere and Cheddar

Here, I like tomatoes because of their acidity. For me, it helps to balance out the smokey, rich flavors of the cheeses and sausage. The cilantro.. we’ve been through this before. We’re in a long-term relationship.

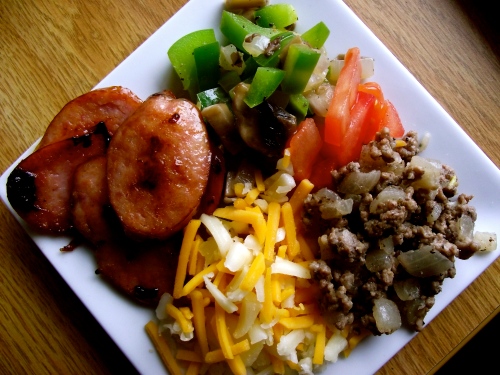
Pairing 5: Polska Keilbasa, Sauteed Mushroom and Green Peppers, Ground Beef, Tomatoes, Gruyere, and Cheddar

See a trend here yet? Pick what you like, assemble, and you’re one step closer to a quesadilla catered to your taste. This could easily be vegetarian friendly if you added a few more ingredients to your options: roasted squash and eggplants, avocado, etc. Slurp.

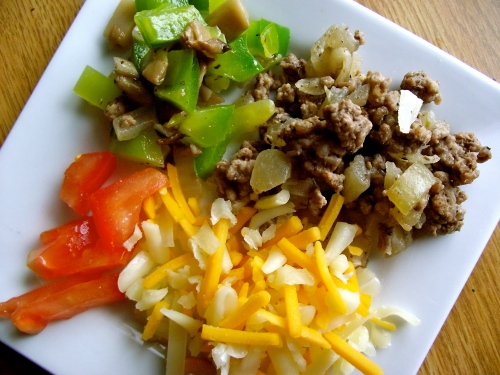
Pairing 6: Tomatoes, Sauteed Mushrooms and Green Peppers, Ground Beef, Gruyere, and Cheddar

You know what else you can make out of these? Omelets. Yes. I just breakfasted this idea. Seems like I’m always finding ways to make more breakfast food. Including words that don’t exist. Like breakfasted.

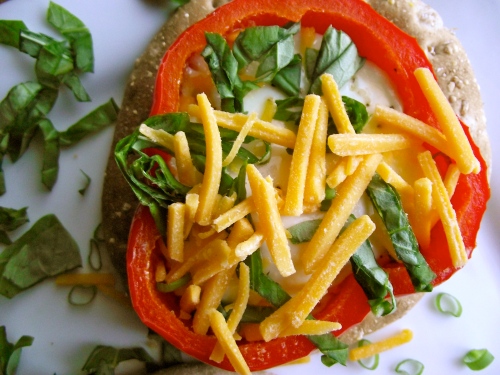
Once you’ve made your way down the assembly line, the next step is to arrange your pickins on your tortilla of choice. Use a frying pan large enough to fit the tortilla with extra room to flip.

Keep the heat on medium to medium-low. It will be hot enough to melt the cheese, without burning the tortilla. Depending on how stuffed you make yours, cook time could vary from 3-4 minutes on each side. All ingredients here were cooked beforehand, so browning the tortilla and melting the cheese into stringy goodness is all that is left to achieve.

Guess which pairing I chose to use here…

Obviously, you’ll place the top half of the other tortilla on top, but for picture’s sake, I decided to leave it off. I’m all about color.

I make my quesadillas in halves because it makes flipping that much easier and less prone to stuffing spillage. Again, your preference. I’m no expert at quesadilla flipping, so these are tricks that make it work for me.

What’s great about this concept is that aside from the cooking and prep work, all these steps can be achieved by your hungry guests. They get an opportunity to be creative and make something unique for themselves while you make sure your green bean casserole will live up to its known standards.

Clearly, it’s a win-win situation.

1 Comment

Filed under Cooking

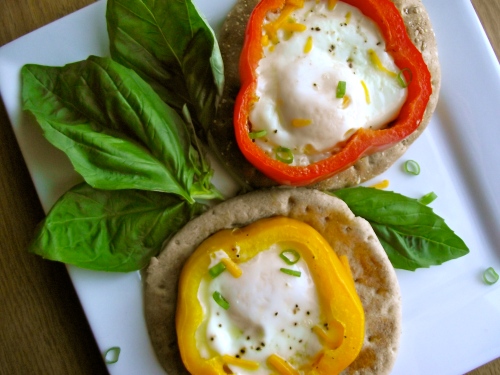
Bell Pepper and Egg Breakfast

Since my recent obsession with Pinterest, I’ve been drooling over lots of easy foodie recipes and filing them away in my Tasty Notes pinboard. It’s where all my productivity has gone recently. What thesis paper? Nom nom nom.

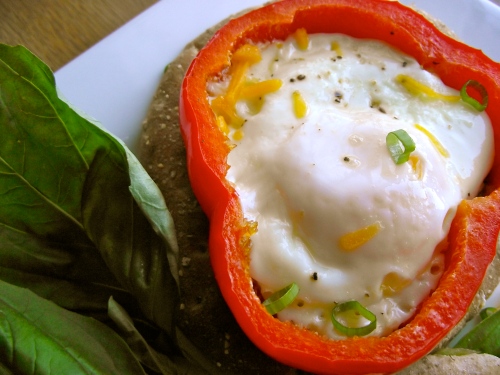
 I chose to try this recipe in particular…ok, I admit, purely for the aesthetics of how the egg, cooked in sliced bell pepper rings, emulate images of, what else, flowers. Ahh, how cute is this! I thought. It was all downhill from there.

 And in all honesty, I have this ongoing love affair with eggs, and breakfast and brinner and I figured this was something I could work into my eggy cravings somewhere.  Mhmm, that’s it.

Here’s what you’ll need:

two eggs

1 bell pepper (or two if you like different colors)

shredded cheese

fresh basil

green onion

salt and pepper

Step 1. Wash and cut the bell pepper into ½ inch thick rings. Remove the white membranes from the inside. The first time I made this, I cut the rings a bit over half an inch because I wanted the ring to be thick enough to hold in the egg.  This will definitely vary depending on the size of egg you use and how big the rings are. Just have fun with it!

 Make sure to slice the rings as evenly as you can, with a non-serrated knife. If the rings aren’t straight, egg will leak out from underneath when you crack the egg into the ring.

 Step 2. Heat a non-stick pan on medium heat with a tablespoon of olive oil. At the same time, turn on the broiler on the high heat setting. If you can use a pan with a metal handle, do so. You’ll see why in a minute.

Step 3. When the oil is heated, add the bell pepper rings and allow to cook 2-3 minutes. Do not flip. Next, crack one egg into each bell pepper ring and season with salt and pepper. Allow 2-3 minutes to let the bottom of the eggs cook.

In the picture, the eggs are left sunny side up and more or less, raw, but I decided to cook the tops of the eggs by sticking the pan under the broiler for about 3 minutes to get the tops of the eggs cooked.

Don’t forget to use oven mitts to take out the pan! In my eager anticipation, I almost forgot to do this – not a good idea.

Step 4. Transfer the pepper-egg on top of toast or wheat sandwich thin. Sprinkle a little cheese and green onion on top and serve!

Or in my case, sprinkle a lot of cheese, chopped basil, and green onion. oh. my. sweet. breakfast. yes.

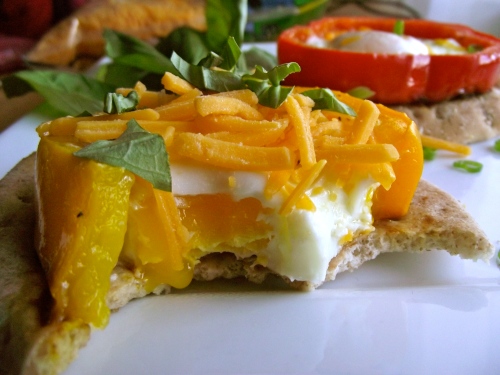
Add the cheese. Go ahead, add a lot. I won’t judge.. Melt it a little, so that it strings out when you bite into it. Use whatever cheese you have. Add chopped bacon. Smile, because that was a genius idea. Then make this again for lunch. (Guilty!)

I love the chopped basil and the cheese together. The basil gave it a bit of freshness that wasn’t too overpowering for the egg. Ah the egg. My life wouldn’t be the same without it.

Cheese, basil, bacon or just salt and pepper – try different toppings with whatever you have on hand. Have fun with it, it’s all about your foodie experience and how you make it unique each time. If you love it, make it and make it again and improve it. Share it. It’s the best thing about cooking.

1 Comment

Filed under Cooking

Basil Lemon Pesto

This past Friday marked the end of finals week and the beginning of a long, luxurious winter break. The feeling of relief was so deliciously surreal that I spent most of the morning rolling around in bed refusing to get up. My room looked nothing short of a hurricane disaster; clothes flung all over the place, papers strewn everywhere but my desk, my poor, over-worked french press soaking in the sink – all remnants of a hectic quarter gone by.

 As I stood, yawning, I couldn’t help but realize how fast time has flown by since I started grad school. In less than twenty-five days, we’ll be ringing in the new year and, in three months, I’ll be wrapping things up here, heading to who knows where, and doing who knows what. Maybe I’ll be in school, maybe I’ll be looking for jobs, maybe I’ll drop everything and travel the world. But, I’ll save those thoughts for another day.

Now faced with an abundance of free time, I welcomed the opportunity to try an idea that’s been on my mind since I discovered a package of Brazil nuts in my kitchen: to make pesto using Brazil nuts instead of pine nuts. That and I was craving pesto…on a mozzarella tomato panini, on grilled chicken, linguine, three cheese tortellini.. just a small craving..no big deal.

The truth is, I’m not crazy about Brazil nuts. I bought them because I’ve never had them before and the name made them sound all too exotic. Alas they were a bit too dry and bland for my taste, so I wanted to reinvent these suckers into something more delectable. The results? Surprisingly amazing! I personally couldn’t tell the difference using Brazil nuts. The consistency and texture of the pesto itself is comparable to that of a pine nut pesto. It’s one beguiling imposter. And I’m ok with that.

Here’s what you’ll need:

¼ cup raw Brazil nuts

1 large garlic clove

1 ½ cups basil leaves

½ cup olive oil

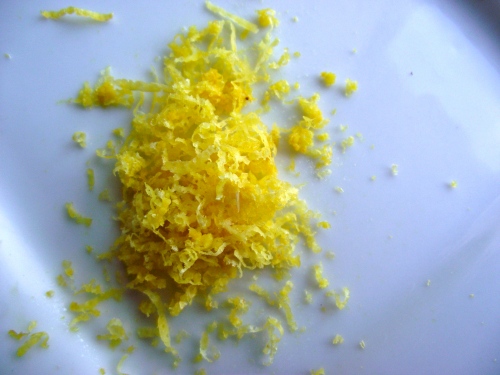
zest of 1 lemon

5 tbsp. fresh lemon juice

1/8 cup grated Parmesan cheese

2 tsp. salt

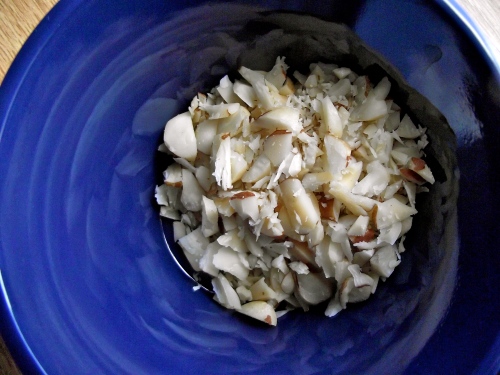
Step 1. Rough chop the Brazil nuts and add to the food processor.

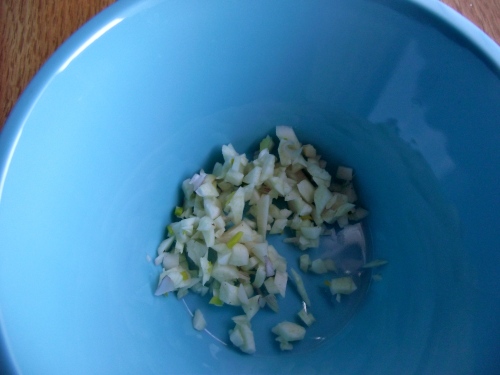
Step 2. Mince the garlic and add with the Brazil nuts. Pulse the mixture once or twice.

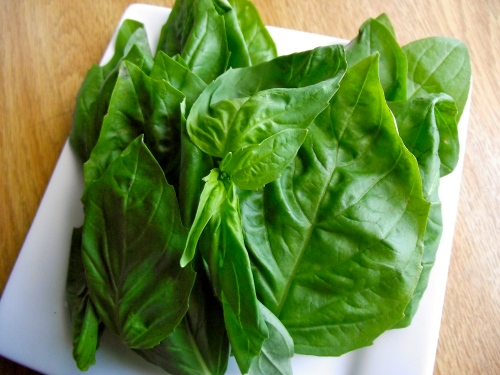
Step 3. Wash the basil leaves, shake off the water, rough chop, and add to the food processor and pulse twice, using a spatula to bring ingredients from the upper sides. Scrape the ingredients from the upper sides closer to the mixture. Do the happy dance because pesto makes the world go ’round.

Step 4. Add the salt, lemon zest and lemon juice. Next, slowly drizzle in the olive oil while running the food processor until all the oil is evenly infused. Use the spatula to help bring ingredients together. Normally, pesto doesn’t call for this much lemon but I prefer a bit more citrus to lighten up the olive oil.

Step 5. Remove the pesto from the food processor and mix in the Parmesan cheese until evenly combined. Taste, and add more salt and lemon juice if desired. You deserve it. Mmm chlorophyll. Did I just say that?

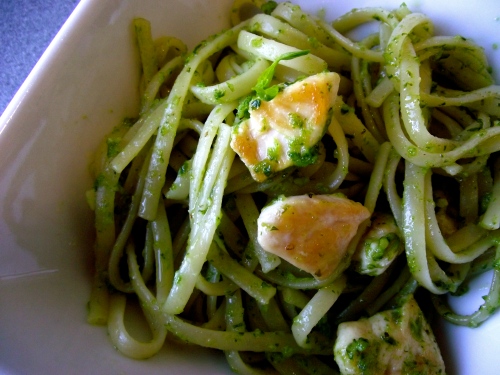
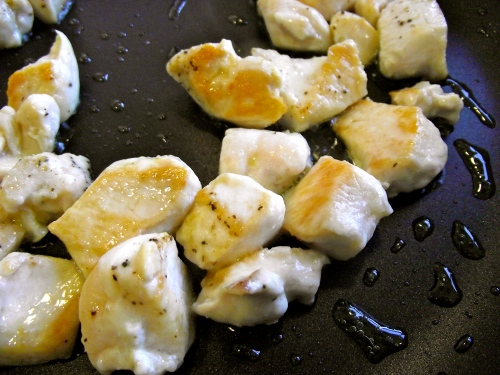
Step 6. Pair the pesto. Today, I had chicken in the fridge so I cubed one chicken breast and pan fried them until golden-brown and cooked through. While they cooked, I seasoned with salt and pepper.

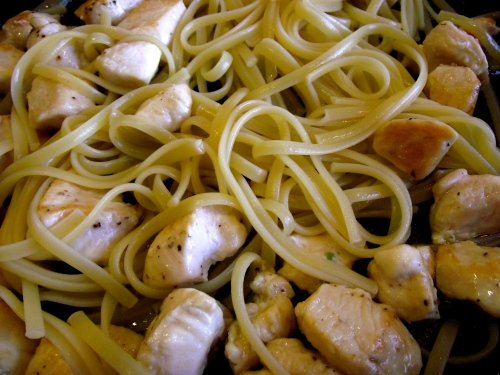
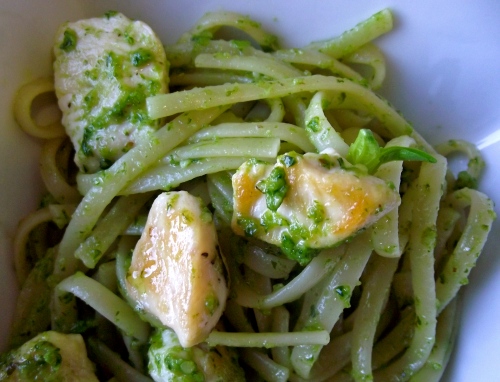
Step 7.  To the chicken, I added 1 cup of cooked linguine pasta and mixed in 2-3 tablespoons of pesto sauce. A little bit goes a long way here, folks. You won’t need a heaping amount for your pasta, so add the pesto a little at a time to avoid over-saucing. And, if you’re like me, add an extra squeeze of lemon on top. Voila!

How can you say no to a face like this? Slurrp.

2 Comments

Filed under Cooking

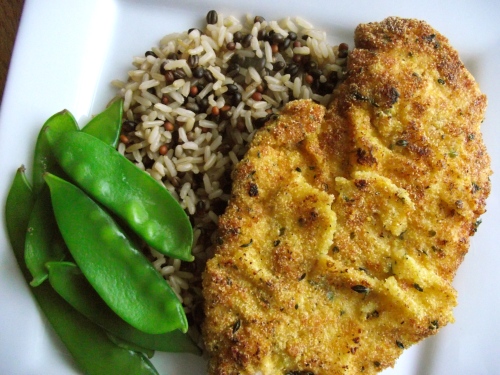
Dijon and Breadcrumb Crusted Chicken Breasts

I’ve been on this mission lately to use whatever I already have in the kitchen to make delicious yet different meals. It’s quite the challenge but I think I’m off to a good start. Why the recent inspiration you may ask?

Here’s the thing. Cooking for one tends to leave a lot of left over ingredients, especially when it comes to herbs and veggies. So what to do with the rest of it? I certainly can’t bear to throw it away but sometimes I forget that I have it in my fridge and it goes to waste. So, in an effort to be more resourceful, I’m determined to find ways to make new meals using the same staple ingredients. Think I can do it?

I had leftover chicken and snow peas from a noodle dish I made for my cousin’s baby shower over the weekend. Everything else I already had in my pantry and fridge. I found this recipe through epicurious.com, one of my absolute favorites to visit when I’m searching for something unique. This one is a great find indeed. It adds a new twist to the regular bread crumb and egg routine. And don’t worry, this won’t taste like you’re eating chicken dipped in mustard at all, which was one of my primary concerns. (Not that I don’t like mustard-it’s delicious! But I didn’t want it to be too overpowering).

For two people, here’s what you’ll need:

2 chicken breast halves

¼ cup Italian style breadcrumbs

¼ cup cornmeal

1 tsp dried thyme

1 tsp dried parsley

salt and pepper

1 egg

1 tbsp. Dijon mustard

olive oil

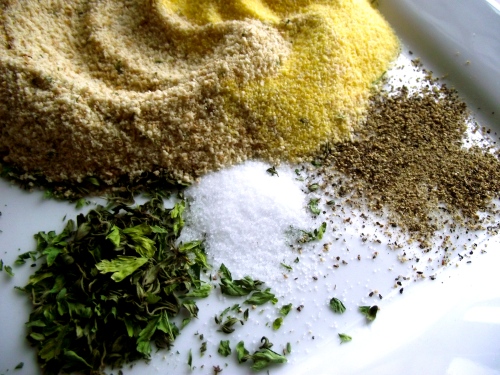
Step 1. Measure out the breadcrumbs, cornmeal, parsley, thyme, salt and pepper.

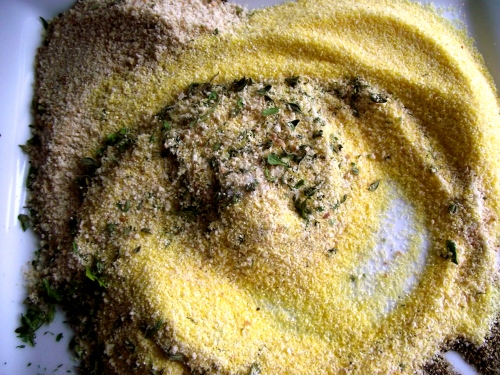
Step 2. Mix the breading thoroughly. Taste and add more salt if needed. That’s right, I said taste! Bland breading makes a bland chicken, ya hear?

Step 3. In a bowl, crack open one egg and add the dijon mustard. I added a few drops of honey and hot sauce just to sweet and spice it up. I’m daring like that.

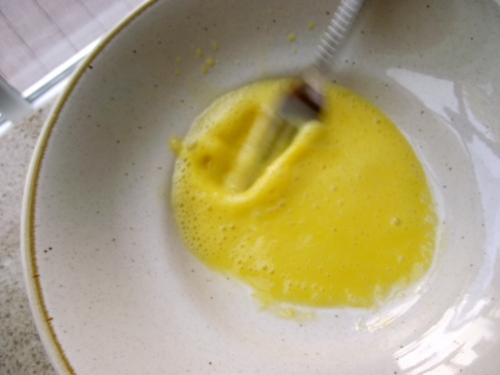
Step 4. Whip up the eggs and Dijon mustard until they are evenly combined in a golden-yellow eggy mixture. I added a bit of pepper because I like to live on the edge. Just a dash is all you need.

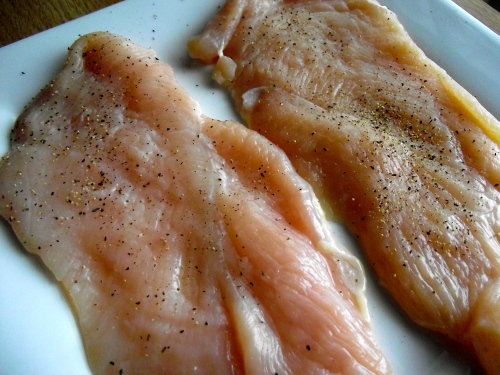
Step 5. Take out a non-stick frying pan, add about 3 tablespoons of olive oil and heat on medium-high. While you’re heating the pan, take out the chicken breasts from the packaging. Slice the chicken breasts lengthwise to get thin cuts – highly recommend! Wash, pat dry, and plate. Season with a bit of salt and pepper.

Chicken breasts tend to be a bit thicker in the middle. If you don’t feel comfortable slicing it yourself, get your grocery store butcher to do it for you or take a mallet, put the chicken breast in between plastic wrap, and smash the living daylights out of it! Ok, not to that extreme, but you do want it somewhat flat.

Step 6. When the oil is hot and ready, dip the chicken into the egg mixture then dredge in the breading mixture. Make sure all surfaces are covered. Shake off any excess breading and place in the hot pan. Allow to cook for 3-4 minutes on one side or until golden brown and crispy.

Step 7. Flip over to the other side and also let cook for about 3 minutes, leaving heat on medium-high. Oooh my, this is the color and texture that you want. Droool. Turn off the heat and place the chicken on a separate plate. Done!

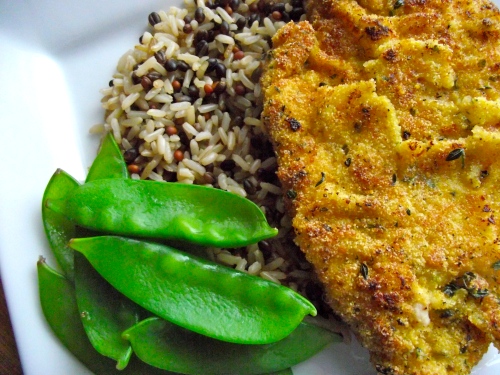
Pair the chicken with your favorite veggies and grains. I used brown rice medley from Trader Joe’s and steamed snow peas. I haven’t been excited about something so simple in such a long time. Perhaps it’s because I didn’t have to purchase anything to make it, which is a rarity in this girl’s kitchen.

1 Comment

Filed under Cooking

Mac and Swiss

What is it about macaroni and cheese that makes it taste so darn good? It must be the macaroni; it must be the cheese. It must be the fact that when mixed together, magic happens. That’s gotta be it. Although simple and seemingly plain, its sheer versatility adds much to its appeal. Tucked away in many traditions are countless varieties on what we claim is the best mac and cheese recipe ever. If you tell me this, I’ll believe you.

I love mac and cheese because it yields to creativity and many times it works. Once, a friend added steak from last night’s dinner into the mix, sprinkled fresh mozzarella on top, popped it in the broiler for a few minutes and served it with fresh diced tomato. Oh my goodness. My heart melted. Possibilities? They’re endless. From cheddar cheese to gruyere and bleu, one’s favorite mac and cheese is really, a personal thing.

This is by no means a recipe for ‘the best mac and cheese ever’, but it is a good place to start, especially if you like cheddar and Swiss cheese. This version highlights their piquant flavors, which is balanced quite nicely by the cream cheese. Expect a burst of sharp, creamy flavor – definitely the kind you won’t get from say, velveeta-type cheeses, which are much much milder. Mix in crispy chopped bacon and serve for dinner? Ohhh, you’ll make new friends.

Here’s what you’ll need:

1/2 box cooked pasta; whatever macaroni your prefer

1/2 cup cream cheese

1 cup swiss cheese

1 cup sharp cheddar cheese

salt, pepper, and parsley for garnish

Step 1. Cook pasta, following directions on box, then drain when cooked. Leave the pasta in the same pot.

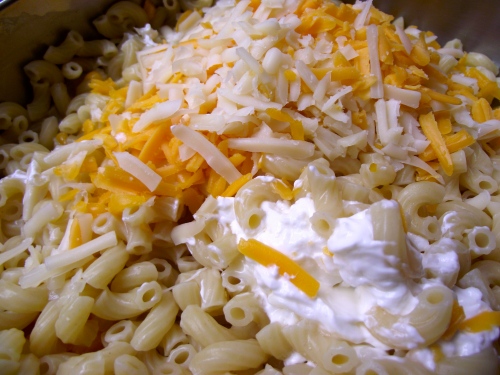
Step 2. On medium-low, add the cream cheese, swiss cheese, and cheddar cheese in small quantities. Mix until evenly combined then add more. Then sneak in a few bites of cheese. I won’t tell.

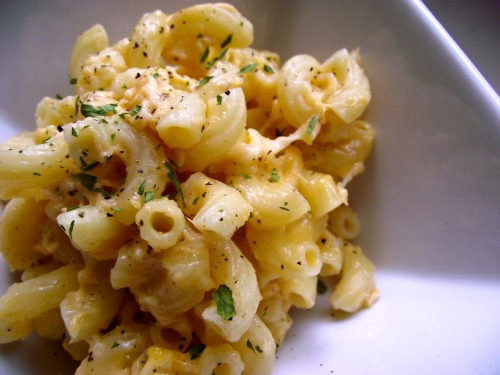
Step 3. Continue until all cheese is evenly mixed and melted. There’s something about the way swiss cheese melts that I love. The stringy quality – there’s nothing quite like it. Add salt and pepper to taste. Mix and taste, and taste some more. Done!

But don’t feel compelled to stop here; sauteed onions and polska kielbasa, broccoli and bacon, chicken and sundried tomatoes, hamburger and…it’s enough to keep me up for hours. But if you enjoy the simple things, I won’t hold it against you.

Make your own perfect mac and cheese. Then share it with me.

This version has a tendency to dry out after popping leftovers in the fridge since the recipe calls for solid ingredients only. Heating it thoroughly with a splash of cream or milk however, restored the macaroni back to creamy goodness.

Leave a comment

Filed under Cooking

Eggs Benedict Brunch

Brunch: quite possibly one of the best inventions ever. It makes my Sundays worthwhile despite Monday quietly looming around the corner. The sun shines brighter, my to-do list disappears, and nothing can go wrong. Sundays that begin with brunch are destined to be amazing. It’s the little things.

One of my absolute brunch favorites includes the ever-decadent Eggs Benedict. I refuse to gain insight on its caloric contest lest it change my feelings towards this staple item. But it probably won’t. And since I indulge in it only upon occasion, I figured that’s enough to justify my blissful ignorance.

Eggs Benedict also happens to be one of my sister’s favorites so when I visited her over the summer, we decided to take it upon ourselves to make brunch instead of following our initial intentions of dining out. The decision couldn’t have been better. It would be near criminal to keep this recipe to myself.

The assembly requires some orchestrating but you’ll find your own rhythm after making it a few times.

Here’s what you’ll need:

For the Hollandaise Sauce:

2 egg yolks

1 1/4 sticks of butter to make 1/2 cup clarified butter

1 1/2 teaspoons cold water

1 tbsp lemon juice

cayenne pepper and salt

Everything else:

2 eggs

2 biscuits or English muffins; made beforehand or bought, kept warm in the oven

4 strips of Canadian-style bacon or whatever bacon you prefer; cooked beforehand

parsley for garnish

a few drops of vinegar

*Hollandaise Sauce recipe adapted from Culinary Arts

Step 1. Make the clarified butter. In a small pot, melt the butter over low heat. Have a spoon and an extra bowl handy. When the butter starts to melt, skim off the white foam from the surface with a spoon and continue until all white foam is removed.

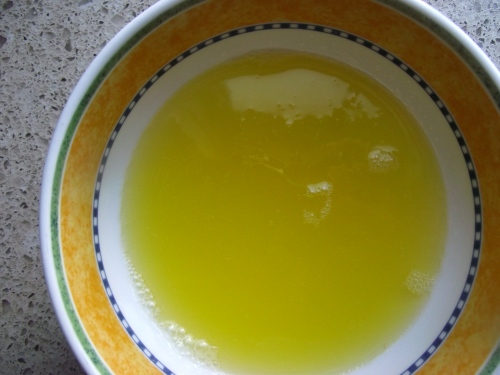
What’s with the white stuff? The foam is comprised of milk solids and water, which separates, leaving behind the golden yellow butterfat.

Step 2. After all the white foam is skimmed from the surface, turn off the heat and slowly transfer the clarified butter into a separate bowl. Set aside.

Why do we clarify butter? Mmhm, it’s a burning question. Clarified butter can withstand up to 100 degrees more than its non-clarified counterpart. And since butter is an integral part of the sauce, it only makes sense to err on the side of caution. Burnt butter is not quite as appetizing as one may think it to be. Not that I’ve tried it or anything…

Step 3. Get your cooking apparatus ready: Fill a saucepan with 1-2 inches of water and get it simmering on the stove. We will use the steam, rather than direct contact with the water to heat the sauce. What kind of science experiment is this!?

Step 4. In the meantime, add the egg yolks and cold water in a separate bowl. You can use any heat-safe bowl except aluminum.

I used cold water from melted ice cubes. Or you can stick a small dish of water in the freezer for a few minutes, while you clarify the butter.

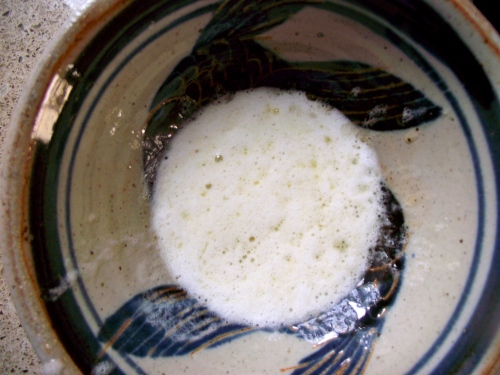
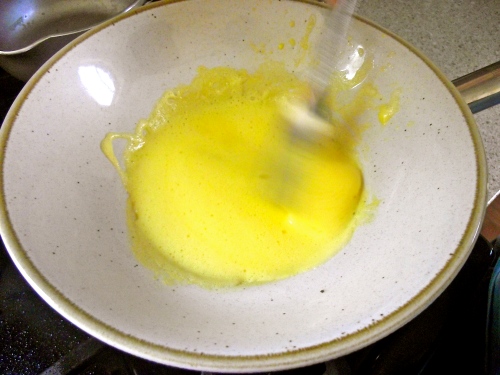
Step 5. Whisk the egg yolks and water until you achieve a light and foamy mixture; about a minute or two.

Step 6. Whisk in the lemon juice, too.

Step 7. Once the water in the saucepan is simmering, place the heat-safe bowl on top. Whisk the egg yolks gently until they slightly thicken. Make sure to keep the heat on a low gentle simmer to prevent getting scrambled eggs.

This low and slow method helps the butter and eggs bind well with each other. It’s a relationship meant to last.

Step 8. When the egg yolks are slightly thickened, remove the bowl from the heat. Slowly, begin adding the butter a teaspoon at a time while whisking. As you continue whisking, the sauce will start to thicken and at this point, you can add larger quantities of butter a time (think steady stream v. drop by drop).

Take it easy on the whisking; rapid fire will separate the emulsion.

Season with salt and cayenne pepper to taste. And I really mean, taste, taste, taste! The finished texture should be smooth yet firm. Add a few drops of warm water and whisk if the sauce is a bit thick. Done! Set aside.

Step 9. Poach the eggs. In a saucepan, heat about 4 inches of water and heat until it is nearly boiling. Add just a tiny amount of vinegar. This will help to solidify the egg.

While waiting for the water to reach almost boiling, crack an egg in a bowl and get a slotted spoon ready. Remove the warm biscuits from the oven, and slice them in half. We used Bisquick to make ours and used the directions on the box to make these biscuits, aka yolk soakers.

Step 10. When the water is near boiling, gently pour the egg into the pan and slowly push the eggs whites closer to the yolk as it continues to cook. Allow to cook for 3-4 minutes then take the egg out with a slotted spoon. Place directly on top of the halved biscuit.

Step 11. Spoon a bit of Hollandaise Sauce (or in my case, a lot) over the poached egg and garnish with a bit of parsley. Voila!

Or, if you’re like my sister, do it up with Canadian-style bacon and a bit of cayenne pepper on top to finish it off. Either way, you’ve achieved something delicious, satisfying and most definitely worth all the hard work. Enjoy!

2 Comments

Filed under Cooking

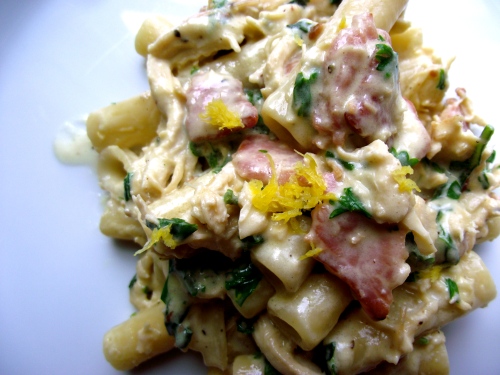
Weekend Chicken Carbonara

This weekend, I visited my sister in Maryland for a bit of countryside, a breath of fresh air, and because I just missed her so. We spent the day strolling around the quaint little town of St. Michaels, an enchanting little place tucked away by the Chesapeake Bay.

Along the water, we found bed and breakfasts covered in overgrown ivy, snuggled up next to some of the most beautiful Victorian homes I’ve ever seen. The folks seemed all tan and glowing, so carefree, without a care in the world where their next step took them. It was clear people came here to relax and unwind. How could I resist such an invitation?

My sister and I grew up learning how to cook together. As children, we were our dad’s best sous chefs, mincing garlic, chopping tomatoes, whipping eggs into a nice froth, and so forth. Through the years we’ve honed what I like to call a nice cooking harmony in the sense that we just know how each other works in the kitchen and what to do next that it hardly needs verbalization. Needless to say, it gives me absolute joy each and every time we get to cook together. This weekend, we did just that, starting with one of her personal favorites, Chicken Carbonara.

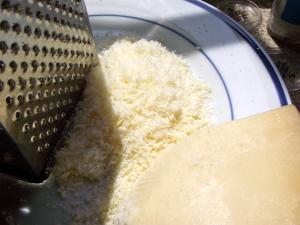
When I arrived at her house, she had already started grating the Parmesan. “We’re using Giada’s recipe by the way”, she says, “..with a bit of my twist to it”. Of course you are! For once, someone telling me what to do in the kitchen. It was a nice change, but don’t get ideas.

Here’s what you’ll need:

2 chicken breasts

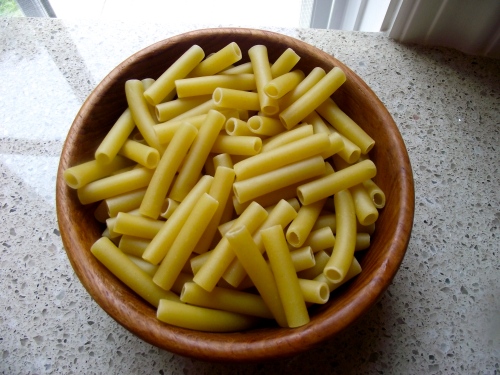
1/2 lb. ziti pasta

1/4 cup fresh Italian parsley

1/4 cup fresh basil

4 egg yolks

4 strips of bacon

1 1/2 cups whipping cream

1 cup freshly grated Parmesan

2 tsp. minced garlic

olive oil

salt and pepper

1 tbsp. finely grated lemon peel

Adapted from Giada di Laurentiis’ Chicken Carbonara recipe, Food Network

Step 1: Grate the Parmesan Cheese

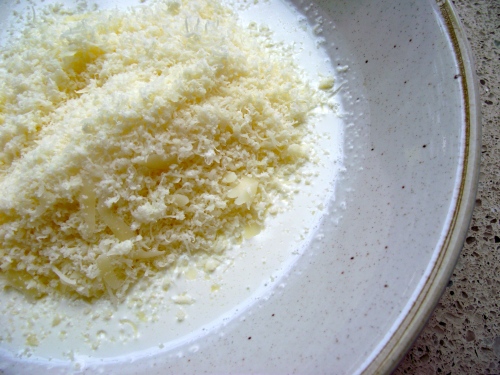
Step 2: In a separate bowl, add the whipping cream, then add the Parmesan Cheese. Don’t mix just yet.

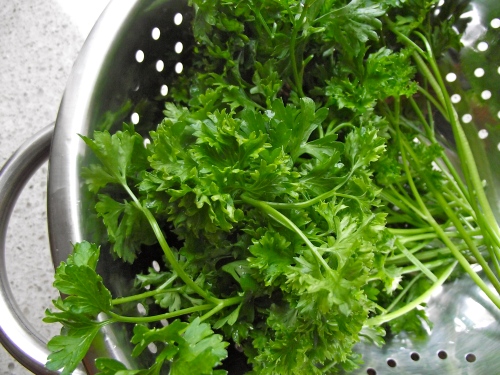
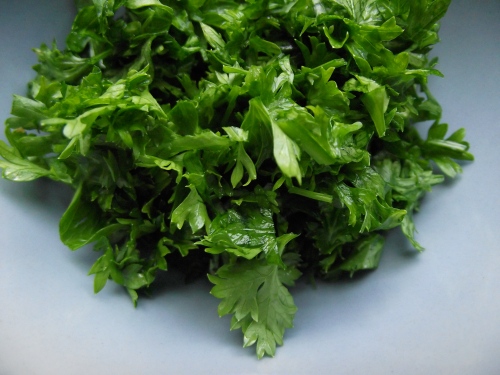
Step 3: Wash and chop the parsley

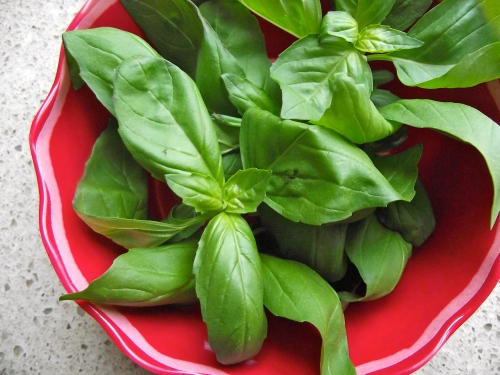
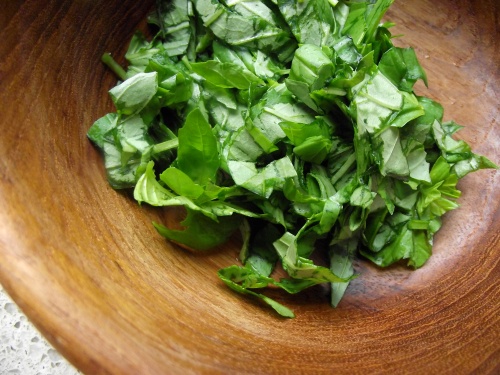
Step 4: Wash and chop the basil

My sister’s kitchen has a wealth of colorful bowls and plates and I couldn’t resist the opportunity to photograph them every chance I could. Ah I can’t wait until I get a kitchen of my own, with room for tons of dishes and color, and copper pots.. but I digress. Here’s the chopped parsley.

And the chopped basil. I love this wooden bowl.

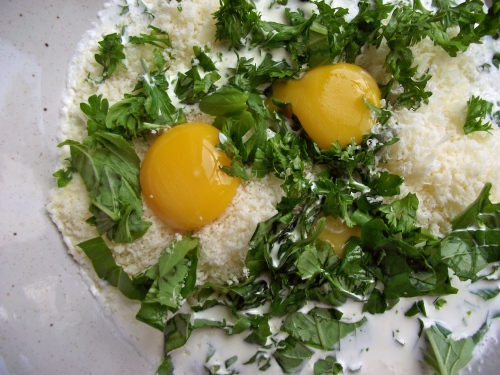
Step 5: Add the chopped parsley, chopped basil, and 4 egg yolks to the cream and grated cheese. The fourth one took a dive beneath the surface and the third yolk is barely hanging on! I would too if I was swimming in a pool of yummyness. Mix this thoroughly until everything is evenly combined. Then place the bowl in the fridge while you get the rest of the ingredients ready.

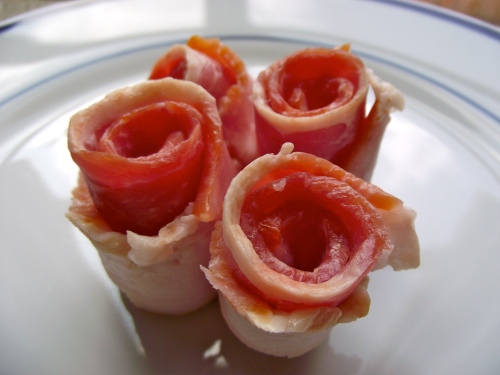
Step 6: After you’ve rolled up your bacon to look like flowers, unroll them, stack them on top of each other and slice them into bite size pieces. You can trim off the fat from the bacon and use double the number of bacon strips if you’d like. Set these aside.

Step 7: Begin cooking the ziti pasta. Follow instructions on the box and add salt and a bit of olive oil to the water. When the pasta is done, drain but keep the pasta warm. Their heat will help cook the cream and egg yolks later on.  I love using ziti for this because in some magical way, the carbonara sauce finds its way inside the ziti. I can’t even describe what biting into that is like. Life-changing, I think.

Step 8: In the meantime, while you’re waiting for the water to boil, heat a non-stick frying pan with olive oil on medium heat. Once hot, fry the chicken breasts until they are cooked. Set them aside to cool a bit before you start shredding them by hand. Or you can use two forks and shred them this way while they’re still hot.

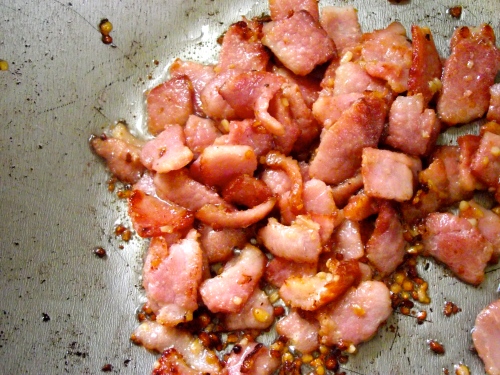
Step 9: After the chicken is done, heat a deep pot with olive oil on medium heat. When hot, add the garlic, followed by the bacon. Continue until the bacon is crispy and golden brown. Then take a piece out to taste its done-ness. Then proceed with two or three more pieces. Don’t feel bad about it.
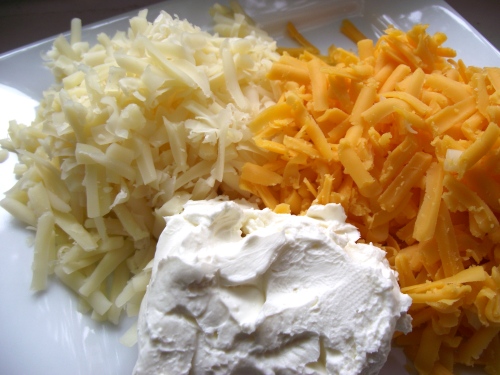
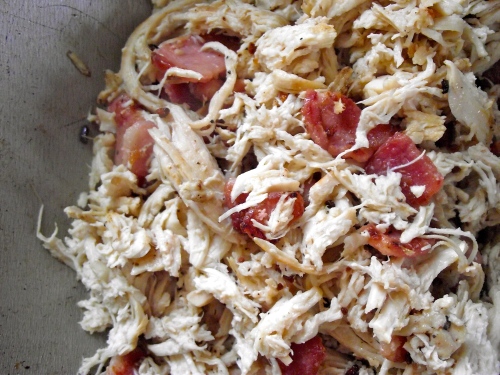
Step 10: Add the shredded chicken to the bacon. Mix, mix, mix. Then turn the heat down to medium-low. At this point, the pasta should be almost done cooking if not already drained and kept warm. Delicious things await.

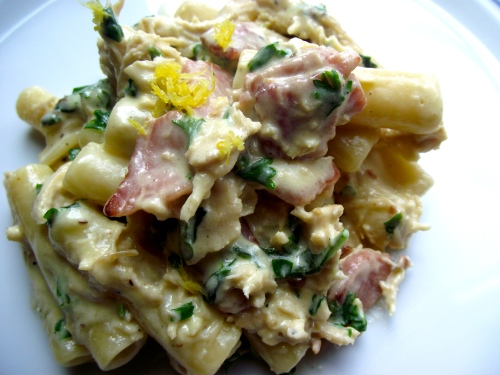
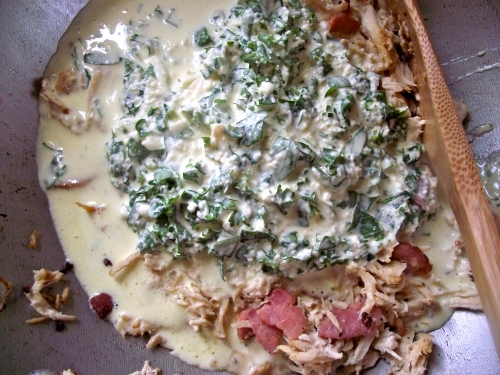
Step 11: Take out the carbonara sauce mixture from the fridge and gently pour it on top of the chicken and bacon. On top of this, add the warm pasta. Mix and taste. Add more salt and pepper if needed. Mix some more. Taste some more. Sneak a bite while she’s not looking. Then sneak more bites. Then pass the point of not caring if she catches you. Because it’s just that. good. Oof. Turn off the heat, transfer into a separate bowl and serve.

I know this will continue to be a favorite of ours for a long time to come and I hope you enjoy it too!


8 Comments

Filed under Cooking

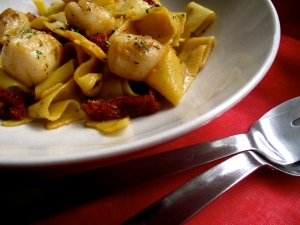
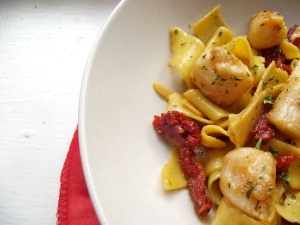
Scallops, Lemon Pepper Pappardelle and Sundried Tomatoes


Let’s make it a date night. I mean it. I have to admit, I absolutely love dressing up and dining al fresco, especially during cool summer nights (but who doesn’t!?). However, there are times when a lovely home-cooked dinner and a movie will suffice. I love those kind of nights too, don’t you? Especially when the beau washes dishes? Absolutely.

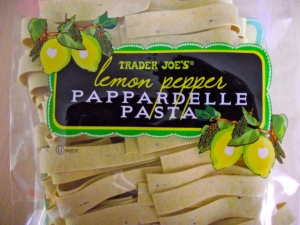
At Trader Joe’s the other day, I came across their flavor infused pasta and I thought, hmmm!! Date night material? Possibly! I decided on the lemon pepper and found to my delight, a delicious recipe on the back of the package. Ohhh it was bound to be good, just from the looks of it. Olive oil, a bit of lemon and some parsley? Yes, please!

This has easily become one of my favorite summer dishes. It is light and refreshing as it is rich with flavor. Oh and the possibilities are endless! If you don’t like scallops, you can easily substitute it with prawns, chicken, or leave it vegetarian as it is. Slurp.

Here’s what you’ll need:

1 package of Trader Joe’s Lemon Pepper Pappardelle Pasta

olive oil

non-stick cooking spray

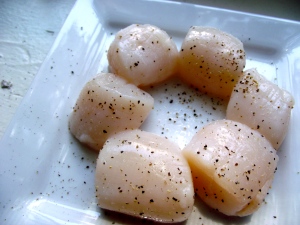
1/2 lb scallops

1/3 cup sundried tomatoes

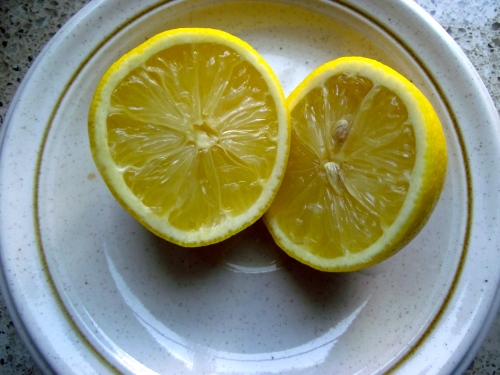
2 tbsp. freshly squeezed lemon juice

salt and pepper

1 tbsp. chopped Italian parsley

Step 1: Cook pasta to al dente then drain and set aside. Season the water with a bit of salt while the pasta cooks. Mix and spray the cooked pasta with a bit of non-stick cooking spray after draining out the water. This will keep them from sticking to each other, which they love to do!

Step 2: While the pasta is cooking, heat a non-stick frying pan with enough olive oil to cover the surface.  In the meantime, give the scallops a nice wash, pat them dry then season with salt and pepper.

Step 3: When the pan is hot, add about a 1/2 tbsp of butter then add the scallops. Sear on one side for about a minute then flip the scallops on the other side then sear for an additional minute or two. They shouldn’t take more than 5 minutes to fully cook. Next, take the scallops out and place them on a separate plate.

Step 4: Add the cooked pappardelle pasta to the same pan the scallops were cooked in. Add the lemon juice, and the sundried tomatoes. Mix until evenly combined. Taste. Add a bit of salt and pepper if needed. Add the scallops. Mix. Taste. Sprinkle in the parsley. Mix. Good enough for your taste? Then it’s done!

I’m dying to try this version with prawns too. And chicken. And possibly just portobello mushrooms. Or all three. OH and can you imagine adding just a sprinkle of fried bacon bits? Oof. Needless to say, many nights of dining-in to come – and I’m perfectly ok with that. Enjoy!

2 Comments

Filed under Cooking

Avocado & Shrimp Summer Salad

Oh summer, how much do I love you? Let me count the ways…

The advent of summer brings many wonderful things, some of which entail the likes of outdoor festivals, sundresses, warmth, and my absolute favorite, farmer markets. Philadelphia is chock full of local finds and depending on which part of the city you wander off into, you’re bound to find something fresh and homegrown. It tickles my fancy.

It’s not easy being a locavore on a student budget, which is why I look forward to summer markets. Most fruits and veggies are in season and their abundance keeps costs low, allowing me the luxury of making fresh favorites like this.

I love this salad. It’s delightfully fresh and light yet filling. Oh and did I mention it’s super easy to make?

Here’s what you’ll need:

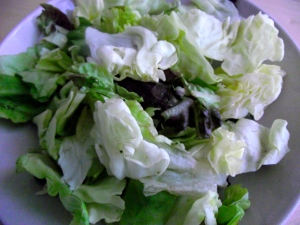
butter lettuce

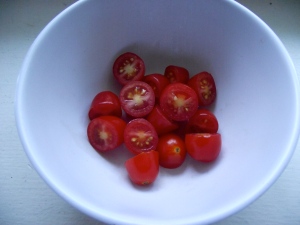
grape tomatoes

croutons, whichever you prefer (i love cheese garlic)

craisins

sliced almonds

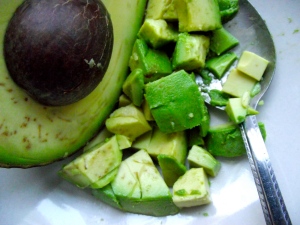
1/2 avocado

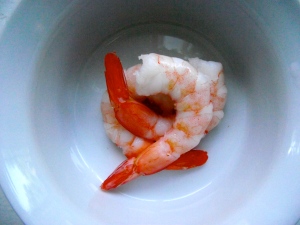
3-5 pieces shrimp, cooked

1 lemon

extra virgin olive oil

sesame oil

salt and pepper

Step 1. Wash and chop the butter lettuce. Butter lettuce. Doesn’t that just sound so decadent? It’s one of my absolute favorites, aside from mixed greens. The leaves are creamy and soft (buttery, if you will) yet they don’t wilt as easily when tossed with dressing. Packaged butter lettuce is just as fine! It usually comes mixed with radiccio, which adds a nice crunch.

Step 2. Wash and slice the grape tomatoes. I could eat these suckers all day long. Yum. Have leftovers? They’d be good in shrimp scampi too, ooh.

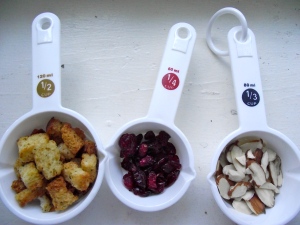
Step 3. Assemble croutons, craisins and almonds. Contrary to the picture, I don’t measure these out (I don’t own small bowls, so here’s me getting creative, haha). I love craisins, so I tend to put more of those in the mix. These are plain almonds, but roasted and salted almonds are crazy delicious too.

Step 4. Score and scoop out 1/2 an avocado. To be honest, this salad recipe idea started with my ongoing love affair with this buttery fruit. Avocados are the best during warmer months and I’d be lying if I said I didn’t try to use it in almost anything I make. Fresh guacamole or just drizzled with a bit of honey, I like trying new ways to enjoy this summer star.

Step 5. De-vein and cook the shrimp for about 3 minutes in boiling water. Allow to cool then chop into bite sized pieces. Then eat a few pieces. Then decide you should have cooked more shrimp. Always the case for me, anyway.

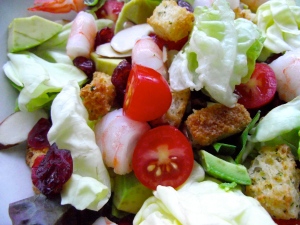
Step 6. In a large bowl, mix all salad components together. Add more toppings if you desire. Then eat one more piece of shrimp and promise you won’t eat more till the very. end. Break that promise.

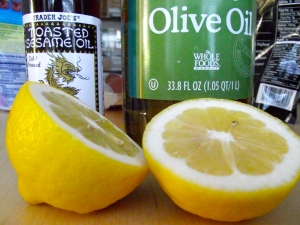
Step 7. Make the salad dressing. In a separate bowl, add the juice of 1 lemon, sans seeds. Measure this, then add exactly the same amount of extra virgin olive oil. It’s a one to one ratio if you will. Add a sprinkle of salt and pepper then whisk, whisk, whisk.

Step 8. Taste and add more salt and pepper to your liking. Finally, add 1-3 drops of sesame oil. I mean it. 1-3 drops only, maybe even less. You want that subtle savory flavor but a drizzle of this will overwhelm your dressing. If it’s your first time making this dressing, add the sesame oil a drop and a taste at a time. You’ll be surprised how much a little goeth a long way.

Step 9. Drizzle the dressing all over the salad then mix, mix, mix. Ahh, summer in my mouth at its finest.

For lunch or for a light dinner, this salad is a favorite, time and again. Make it for your friends, bring it to a picnic, or enjoy it for yourself. Until next time foodies!

4 Comments

Filed under Cooking

Deep Fried Oreos

Deep fried what?! Uh-huh. A decadent cookie-doughnut so sinfully easy to make it requires hardly any effort at all.  That could be a good or bad thing depending on how you look at it, yes?

Treats like this take me back to state fairs I frequented each summer with friends and family alike. My sister and I shared a humongous turkey leg, maybe a corndog, and possibly a funnel cake depending on which rides we had yet to try.

I have to admit, I’m not much of a sweet tooth myself but I can’t resist to share this with you since I know many adventurous foodies alike would probably be willing to try these at least once…or twice…or three times. They’re just addicting like that.

You’ll need:

Vegetable Oil

Funnel Cake Batter

A bag of regular Oreo cookies (Double stuffed, if you dare)

Step 1: In a deep pot, heat enough oil to fully submerge an Oreo cookie.

Step 2: While waiting for the oil to heat, make the funnel cake batter according to the directions on the box. or pail.

Step 3: Before coating the cookies, make sure the oil is has reached the right temperature. I usually do a quick test by dropping dollop of batter into the oil. If it browns too quickly, it’s too hot and if it sinks to the bottom with no bubbles, the oil is not quite ready.

You’ll know the oil is ready when you see bubbles and the test batter floats to the top after a few seconds, showing a golden brown color. Fish it out quick! It’ll continue to cook for a few more minutes out of the pot.

Step 4: Dunk the Oreo into the batter and give it a good coating.

Step 5: Immediately after the dunking, gently drop the cookie into the oil. Be careful of oil spatters! I would only do 3-4 cookies at a time since they do cook fast. The batter usually takes only 3 minutes to fry.

Step 6: When the batter looks golden brown, use a slotted spoon to scoop it out and place on a paper towel-lined plate.

Wait until cool enough to dig in your chompers! Got a big glass of milk? Oh, it’s over! Forget about it. Yum.

Glaze it with a simple sugar glaze coating for an extra decadent treat..oh my my my. Many thanks to F. for this recipe and for subsequent enthusiastic ideas on other goodies to deep fry. I keep them close to my heart.

Happy cooking, y’all!

5 Comments

Filed under Cooking